Customer directory
Link conversations to known customers so agents see a real name, and pin customers to a specific number.
Overview
By default agents see a masked alias like Customer 0007. The Customer Directory lets you store your known customers (code, phone, name) and link conversations to them — so agents see the customer's name instead of the alias, while the phone number stays hidden from anyone without the directory permission. You can also give customers a status badge and pin them to a specific number.
Note: Viewing and editing the directory needs the Manage customers permission — and it reveals real phone numbers, so grant it only to trusted staff. See Masking & privacy.
Add a customer
-
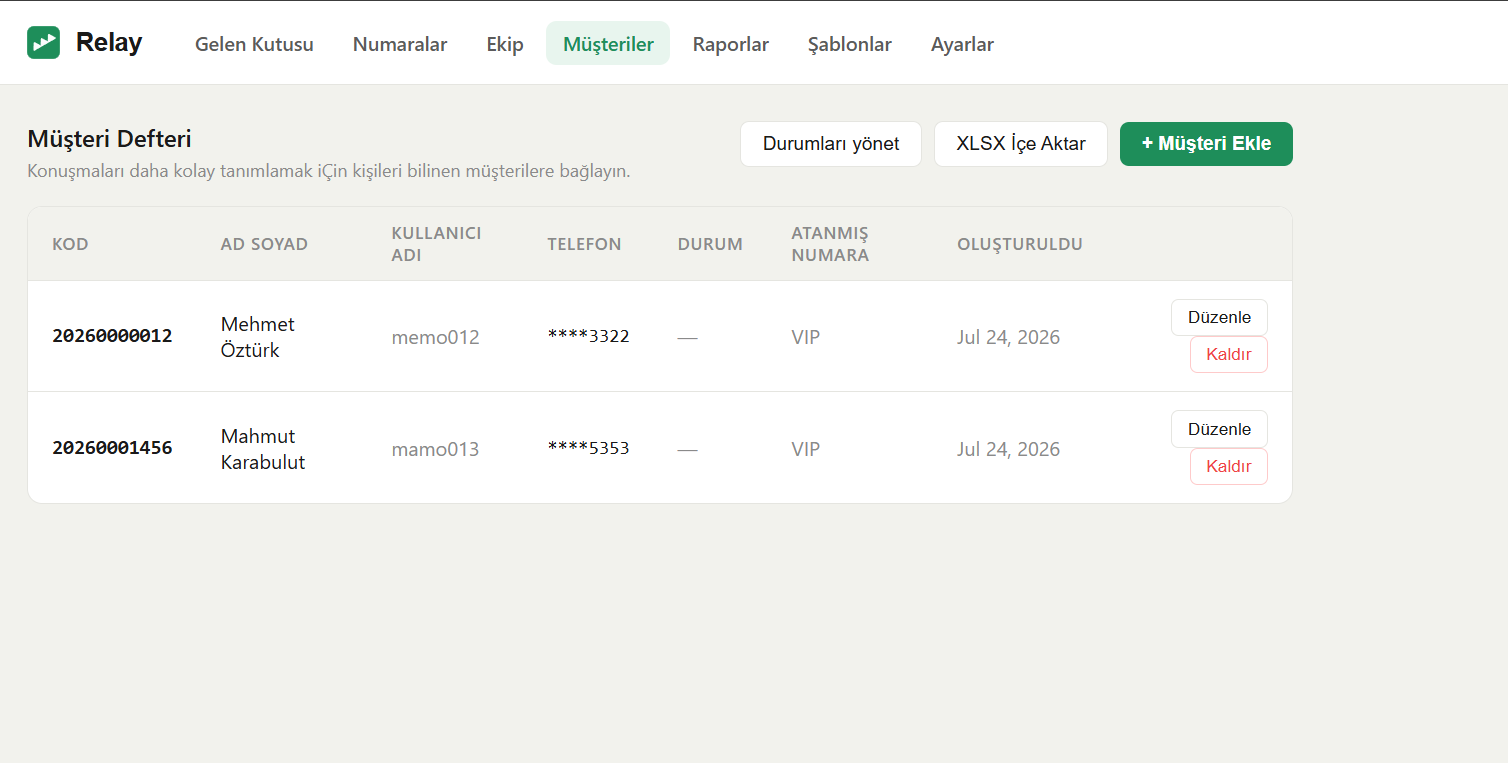
Open Customers. In the top navigation, click Customers.
-
Add one. Click + Add Customer and fill in at least the Code and Phone (international format, digits only, e.g.
491234567890). Name fields, Assigned number, and Status are optional. -
Save. The customer is added to the directory.
Import customers from a file
For a bulk load, import a spreadsheet.
- On the Customers page, click Import XLSX.
- Click Download the template to get a file with the exact column headers.
- Fill it in and upload it. Column rules:
- Required:
code,phone(digits only). - Optional:
customer name,middle name,surname,username,assigned whatsapp,status. assigned whatsappandstatusare matched by their label — an unrecognised label is left blank, not rejected.- Rows whose
codeorphoneduplicates an existing customer are skipped. - Tick update existing to overwrite matching customers (by
code) from the sheet.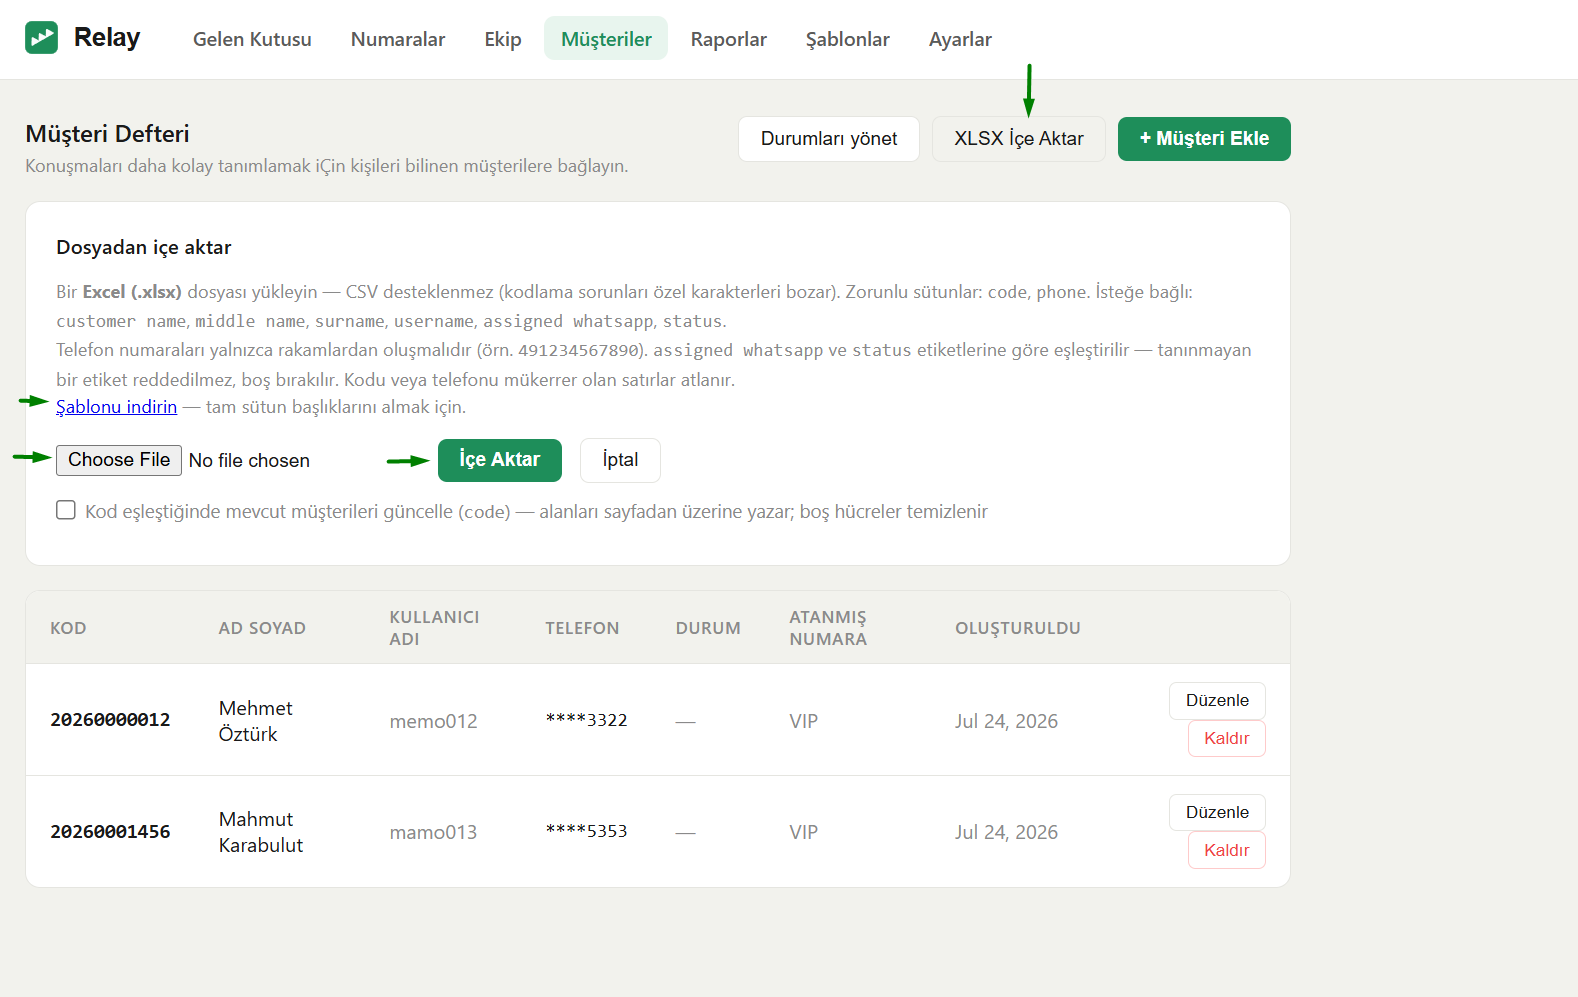
Note: Use Excel (.xlsx), not CSV — CSV encoding corrupts Turkish and other special characters.
Link a conversation to a customer
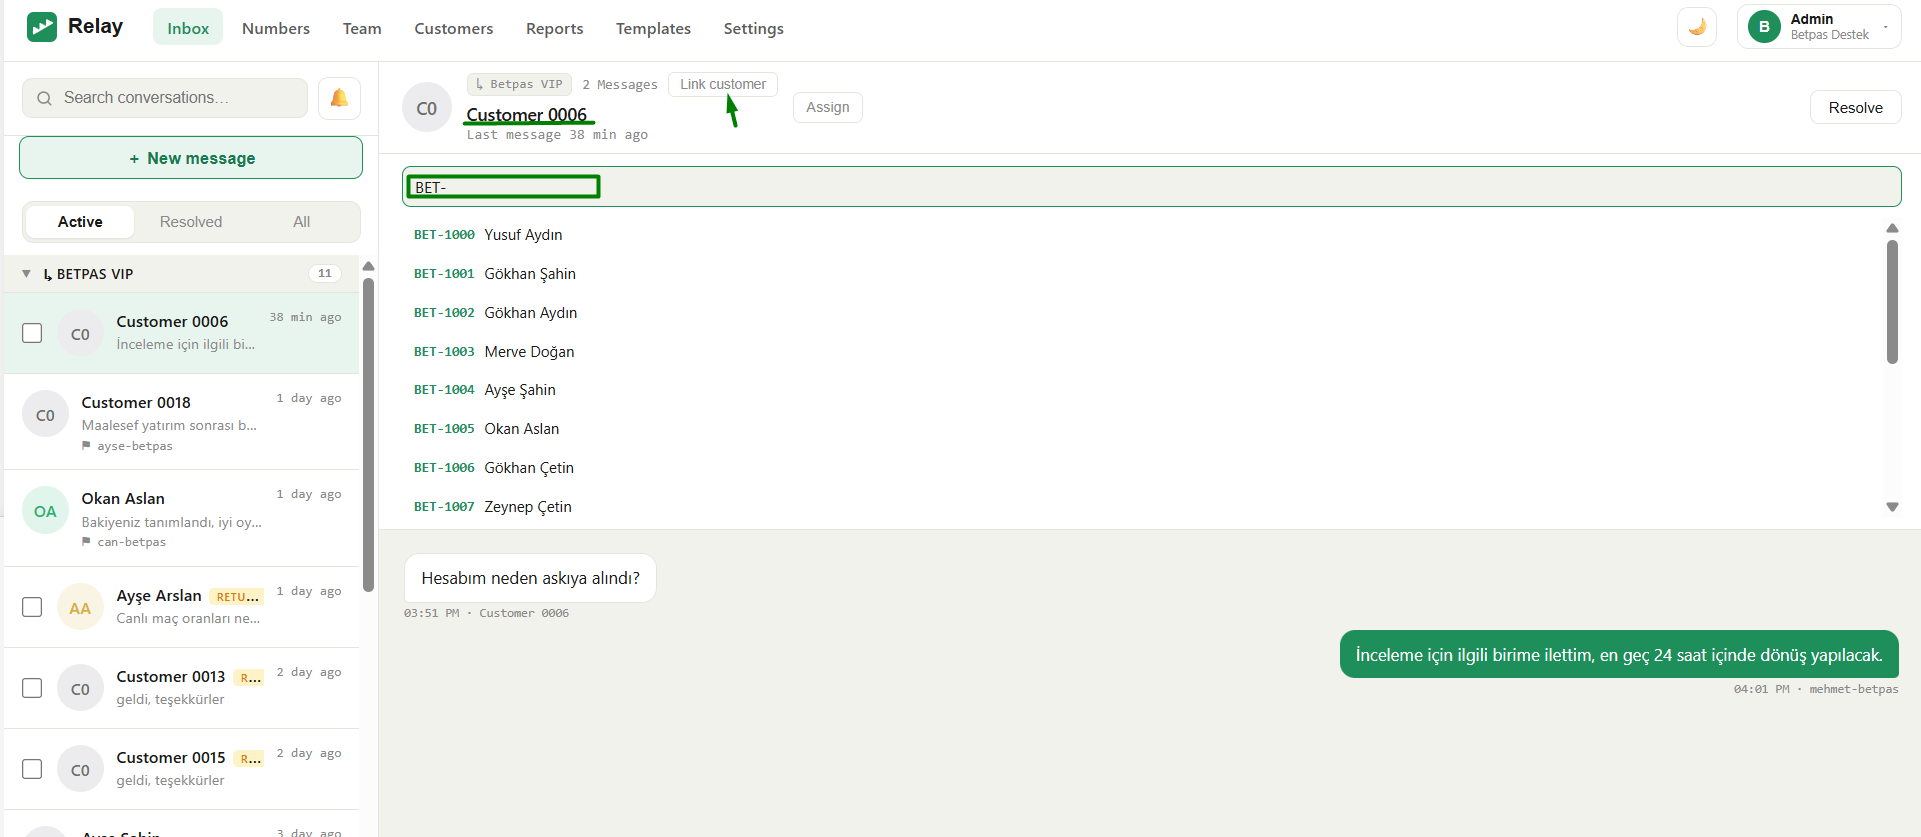
From the inbox, open a conversation and click Link customer, then search your directory and pick the record. The conversation now shows that customer's name. (Linking needs the Link customer permission, or Manage customers.)
While a chat isn't linked yet, Relay suggests likely customers at the top of the search: by the chat's name (handy for Telegram, where there's no phone number to match), or by a customer code or username the customer wrote. A single strong match also shows in the chat header with a Link button. You always confirm; nothing is linked on its own. A manager can Unlink a chat that was linked to the wrong customer. A WhatsApp chat linked by the customer's own phone number can't be unlinked while that number matches (the next message would link it again): correct the number in the directory first, then unlink.
To clear many at once, a manager can use Unlinked chats on the Customers page: every chat not linked to a customer yet, with the most likely customer for each and the best matches first. Filter by channel (Telegram first, or WhatsApp when there is no Telegram account), click Show messages to check who it is, then Link the suggestion or Choose another customer. Undo reverses a link made there. The list looks for a code or username in each chat's newest 30 messages; a chat's own Link panel looks further back.
Find a chat by customer code
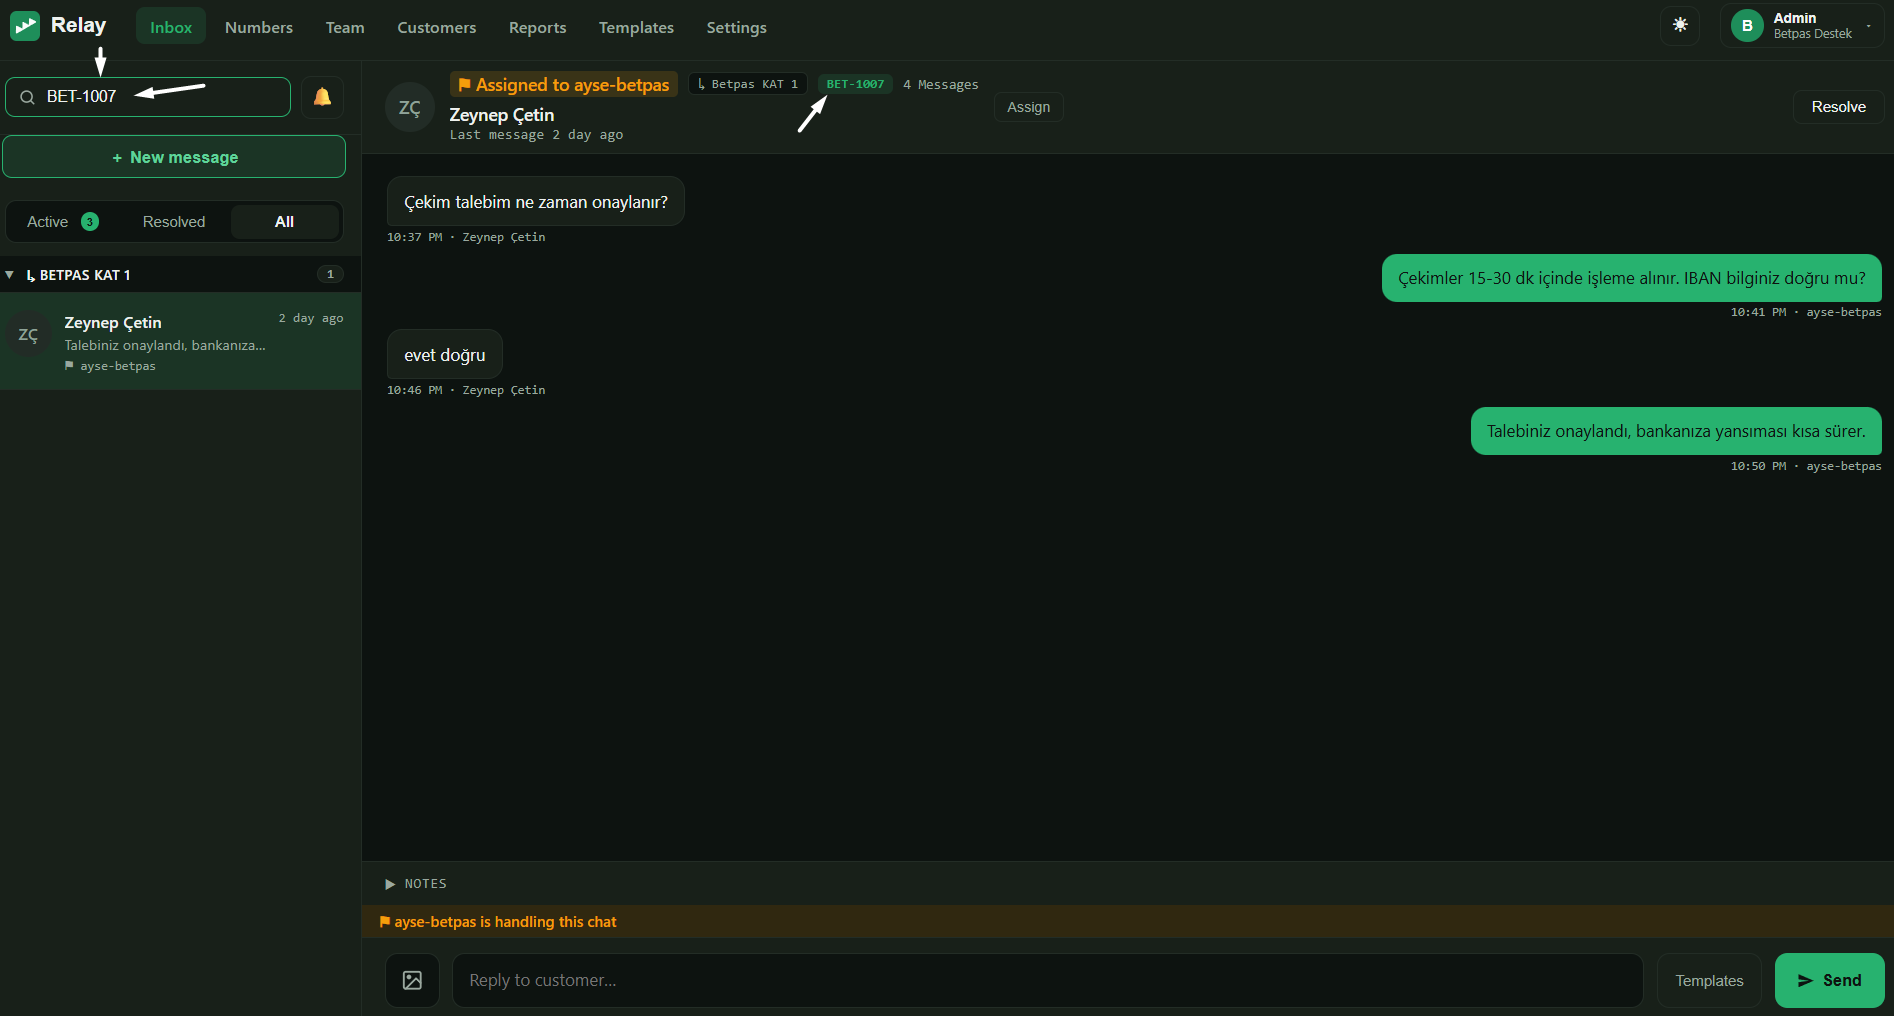
The inbox search box matches a linked customer's code as well as their name and alias — so pasting a member's code filters the conversation list straight to their chat, without needing to remember their name. Search also finds older conversations and adds them to the list with an Older badge.
Statuses
Give customers a coloured badge (e.g. VIP) that shows on their conversations.
- On the Customers page, click Manage statuses.
- Add a status label and pick a colour.
- Assign a status to a customer from their record (No status by default).
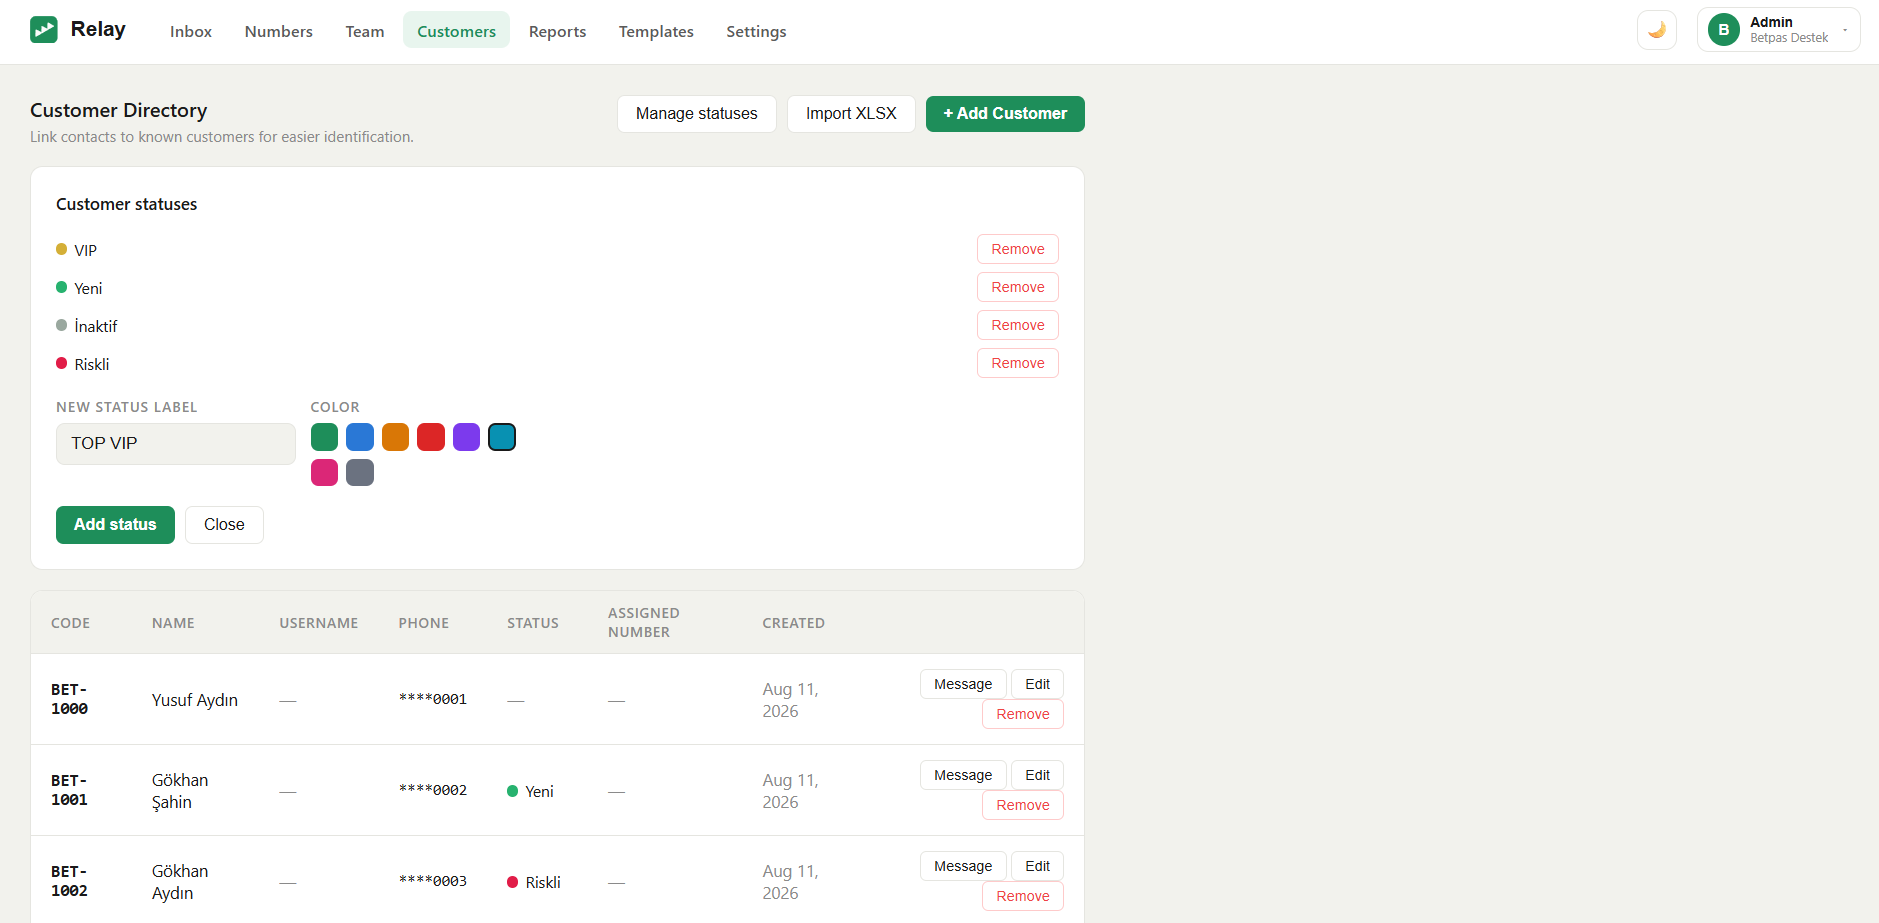
Pin a customer to a number (Assigned number)
A customer's Assigned number controls which of your numbers replies to them:
- Any number (dynamic) (default) — replies go from whichever number they wrote to.
- A specific number — the customer always converses through that one number, even if they message a different one.
Next steps
- Topics & statuses — auto-tag conversations by subject.
- Masking & privacy — who can see phone numbers.