Create a workspace
A guide for the Super-admin to set up a workspace and its Admin account.
Overview
A workspace is one independent team — its own numbers, agents, customers, and inbox, isolated from every other workspace. The Super-admin creates workspaces from the Admin panel; each workspace gets one Admin account to run it. Create one workspace per team or brand you support.
Steps
-
Sign in to the Admin panel. Go to
https://your-domain.com/adminand sign in with your Super-admin password and the 6-digit code from your authenticator. -
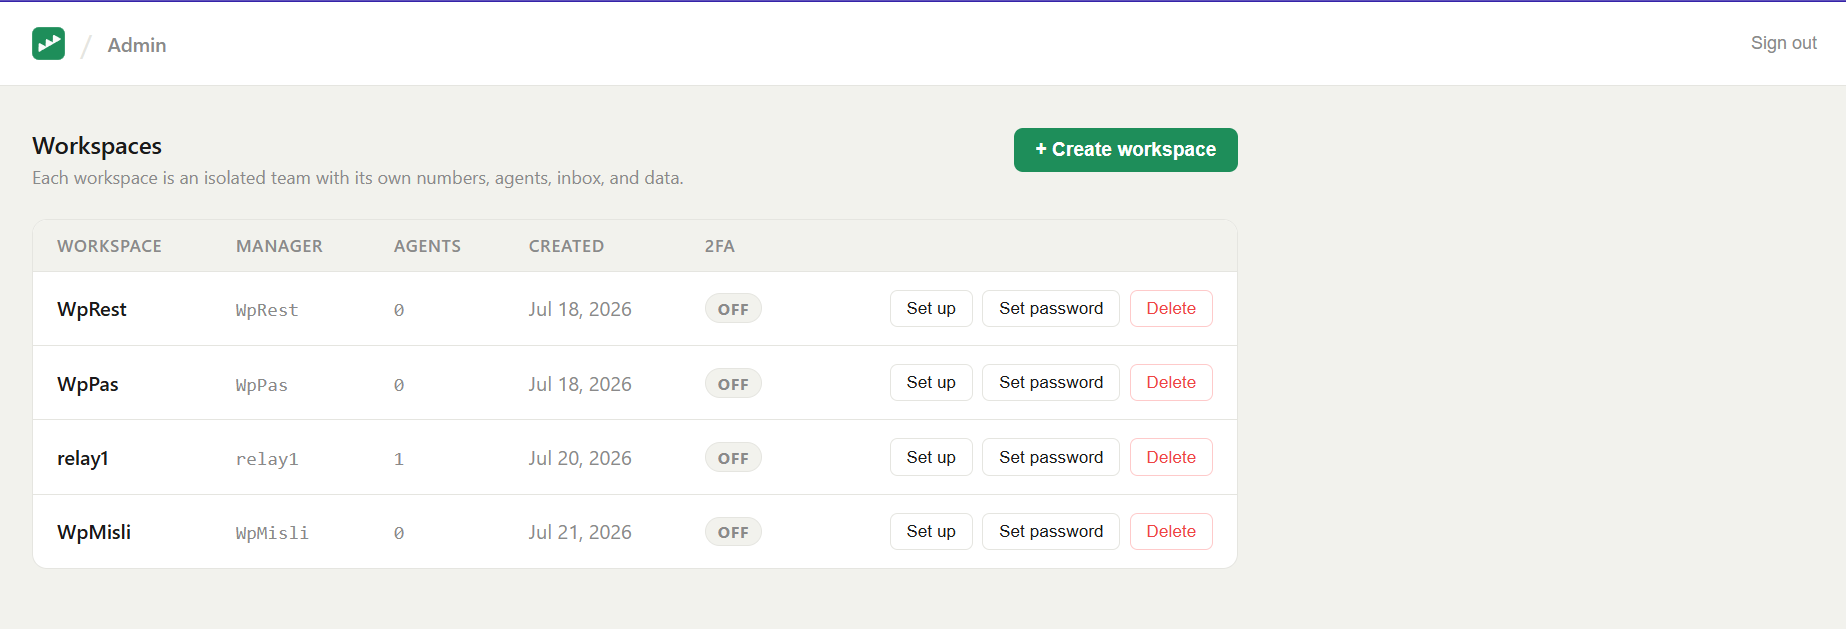
Open Workspaces. The Admin panel shows the Workspaces list — every workspace with its Manager, Name, created date, and agent count.
-
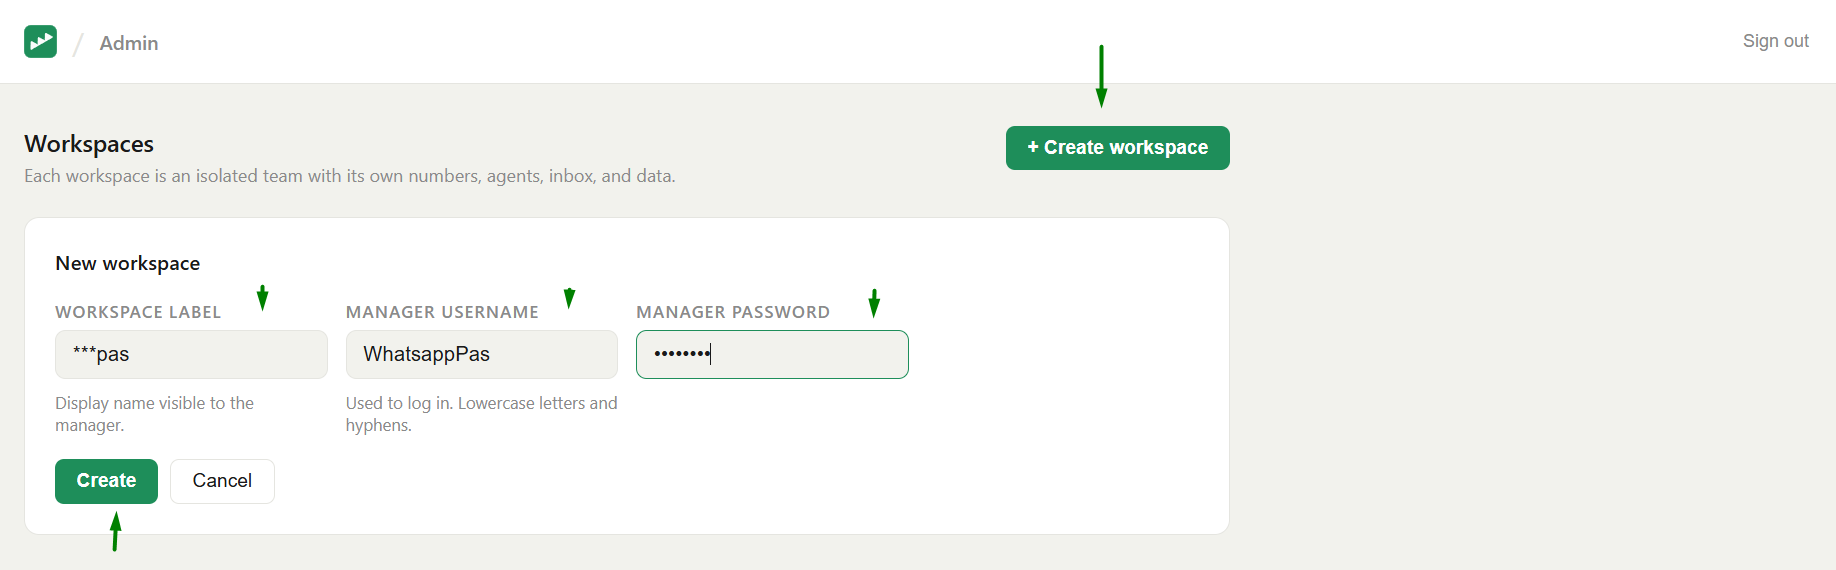
Create the workspace. Click Create Workspace and fill in:
- Workspace Name — a label for the team, e.g.
Brand A Support. - Manager Username — the login name for this workspace's Admin account.
- Password — at least 8 characters.
Click Create Workspace to save.
- Share the credentials. Give the Manager Username and password to whoever will run
the workspace. They sign in at
https://your-domain.com/login— and once inside, their role is shown as Admin.
Note: The name you enter as Manager Username is what that person types to log in. Their role inside the workspace is labelled Admin — same account, two names for the two places you see it (the Admin panel calls them the Manager; the workspace calls them the Admin).
Managing a workspace later
From the Workspaces list the Super-admin can:
- Set Password — reset a workspace Admin's password.
- Delete — remove a workspace. This is permanent and removes its data.
Next steps
Hand off to the workspace Admin: they sign in and connect a WhatsApp number, then add agents.